Battery Charger
A patented product by Eastman.
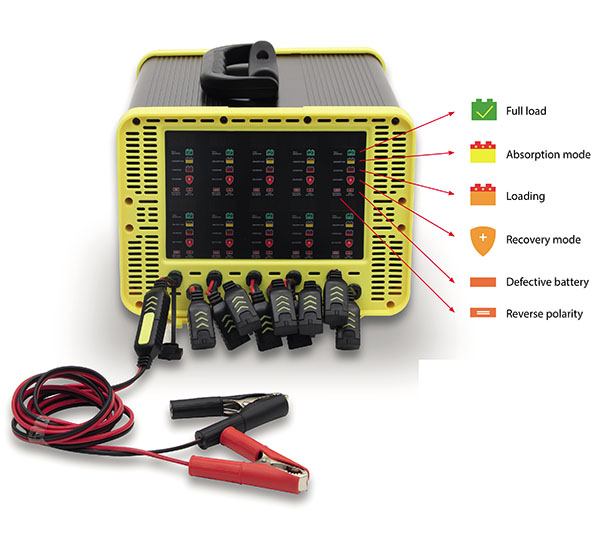
Eastman’s Automatic 12V 1.5 Amp Battery Charger incorporates superior 9-stage charging technology with 10-port charge. This high power unit provides error proof operation to fully charge sealed maintenance free and conventional or dry charge batteries. Controlled by a microprocessor chip, the charger detects the charging mode required to charge the battery. The Chip monitors the state of the battery charge and begins charging automatically when the battery charge drops to a specific voltage.
Below are a few features of this Automatic 12V 1.5 Amp battery charger:
- Designed to prevent overcharging
- AC power LED indicator
- Reverse polarity protection
- Spark-free operation
- 10 ports to charge many batteries at once
- Intelligent charger, controlled by microprocessor chip
- Automatic cut to avoid overload
- Load completion indicator
- Defective battery indicator
- Battery accessory leads and fused ring connectors included
TECHNICAL SPECIFICATION
- Model -ET 10x2A
- Input – 100- 240VAC 50/60Hz
- Input cable – 2m / 0.75mm2
- Output – 12VDC 2APer Channel
- Maximum load current: 2 amps – 2A
- Maximumvoltage – 14.4 + 0.2V
- Output cable – 10 X 0.1 / 18AWG
- Clamp cable length /AWG – 10×1.8 / 18AWG
How to charge a battery
Sealed Battery Charging Procedure:
Given below are a few instructions to follow:
- Connect cablesto the battery terminals before turning on the charger, red cable goesto positive (+) terminal and black to negative terminal (-)
- Gel batteries or SMF batteries should never be charged at more than 14.4V as it can damage the battery
- Initially go for low amperage when charging or look at instructions provided with the battery to charge at a specific amperage
- Load test the battery at 3 times its ampere hour rating for 15 secs or use and automatic battery tester to determine the battery condition and then check the voltage
- Voltage should be minimum 12.4V on a 12V battery
- Battery is then ready to be fitted
- If the voltage reading is below 12.4V or the battery fails the automatic battery test, repeat the charging and test cycle
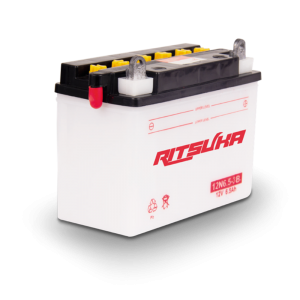
Dry Charge/Conventional Battery Charging Procedure
- Place it on a level surface
- Remove the yellow filler caps, placing them safely on one side
- Remove the sealing cap from the vent, never replace this after the battery has been filled with electrolyte as it may cause the battery to rupture
- Fill each cell with electrolyte to the fill level as indicated on the battery case (Always wear protective eyewear and gloves when working with electrolytes)
- The electolyte should have a specific gravity of 1.265 and be between 62-86F
- Leave the battery for a minimum of 30 minutes and gently tap occasionally on the case to remove any bubbles trapped between the plates
- If after 30 minutes the electrolyte level has fallen, fill it to the upper fill levels as indicated on the battery case
- Repplace the filler caps loosely and begin to change the battery at 1/10 of its rated capacity for 3-5 hours. charging at higher rate could damage the battery
- Do not connect or disconnect the battery while the charger is switched on as this may cause sparks that could ignite the hydrogen gas emitted from the cells during charging
- Monitor the electrolyte level during charging and top up the fill line as necessary
- When charging is complete, turn off the charger and disconnect it from the battery
- Push or screw down the yellow filler caps. Make sure not to over-tighten them.
- Clean off any spilled electrolyte with water and baking soda solution
- Allow the battery to stand of atleast 30 minutes
- Load test the battery at 3 times its ampere hour rating for 15 seconds or use an automatic battery tester to determine the battery condition and then check the voltage
- Voltage should be minimum 12.4v on a 12v battery
Technical Features
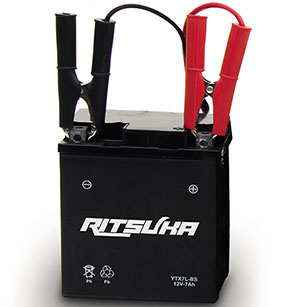
- Sealed Construction
The unique construction and sealing technique ensures no electrolyte leakage from case or terminals.
- Electrolyte Suspension System
All batteries utilize RITSUKA’s unique electrolyte suspension sysytem incorporating a microfine glass mat to retain the maximum amount of electrolyte in the cells. The electrolyte is retained in the separator material and there is no free electrolyte to escape from the cells. No gels or other contaminants are added.
- Recombination Technology
The design of RITSUKA’s batteries incorporates the very latest oxygen recombination technology to effectively eliminate the need for watering during normal use.
- Low Maintenance Operation
Due to the perfectly sealed construction and the recombination of gasses within the cell,the battery is almost maintenance free
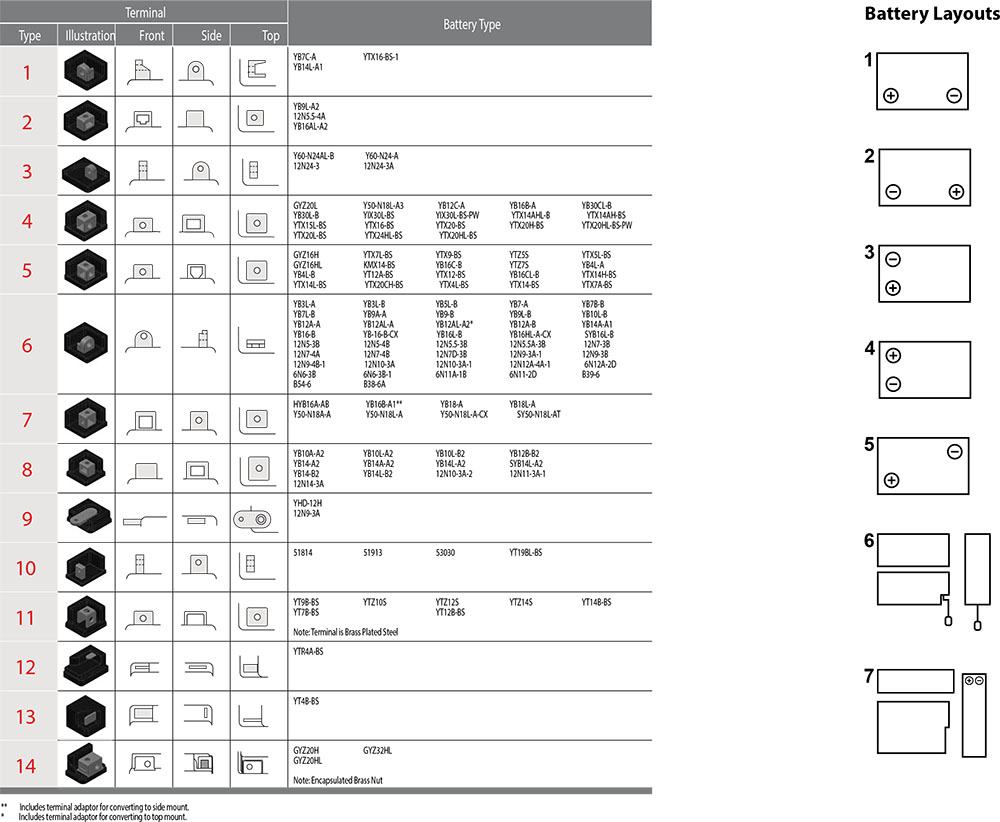
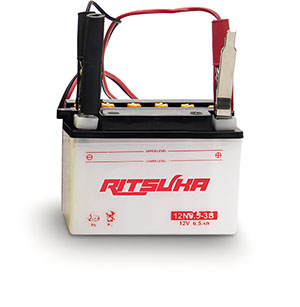
- Terminals
Batteries are manufactured using a range of terminals which vary in size and type. Please refer to
details as shown below:
Terminal Configurations
Terminal shapes vary from one battery to another. By identifying the correct replacement battery from the listing in this book, you are assured of the proper terminal configuration.
Battery Safety
Batteries can be dangerous, so you have to make sure that some simple safety precautions are always followed. Working with batteries poses two hazards: potentially explosive gases that are given off during charging, and sulfuric acid that are very corrosive.
Here’s an 8-point list that’ll help keep those hazards under control:
- Absolutely no smoking, sparks or open flames around batteries. Batteries can produce hydrogen and oxygen; if they ignite the battery can rupture.
- On conventional batteries, loosen vent caps when charging and ventilate the entire charging area.
- A build-up of hydrogen and oxygen levels in the battery or in the room where it’s being charged
can create a hazard.
- If a battery feels hot to touch during charging, stop charging and allow it to cool before resuming.
- Heat damages the plates, and a battery that’s too hot can rupture.
- Never put the red sealing cap back on the battery once you take it off.If you do, gases trapped inside can explode. Make sure the vent tube isn’t kinked or blocked, for the same reason.
- Connect the charger to battery properly: positive to positive, negative to negative. Unplug the charger or turn it off before you disconnect the lead
Points To Remember
- Ventilate battery charging area.
- Charging gives off gases – no smoking, sparks or flames
- Safety glasses or face shields protect against eye damage
- Acid swallowed or in the eyes requires immediate antidotes and medical care.
- All safety considerations are important… review them frequently
Battery Testing Devices
How much of a change does a battery have? There are two easy and reliable ways to find out:
- A hydrometer, which comes in floating ball and calibrated float types
- A voltmeter (or multimeter, which gived DC voltage Readings)
Which is the best?
If you’re choosing between two hydrometers, opt for the calibrated float type. It gives you an exact specific gravity reading(that is, the density of the electrolyte compared to water), that’s much more accurate than floating balls. A voltmeter or multimeter can be used where a hydrometer can’t. MostsealedVRLA or low maintenance batteries have to be tested witha voltmeter.
Battery testing requires a voltmeter that can measure DC voltage. Remember to always connect a voltmeter parallel to
the circuit being tested, observing polarity; otherwise, the pointer will travel in the wrong direction. It’s a good idea to
periodically check a voltmeter against another one of known accuracy
Battery Testing
There are two types of battery tests: Unloaded and Loaded. An Unloaded Test is made on a battery without discharging current. It’ssimplest and most commonly used. And if you need a precise reading, Loaded testing is the answer. It’s more accurate.
Unloaded Testing
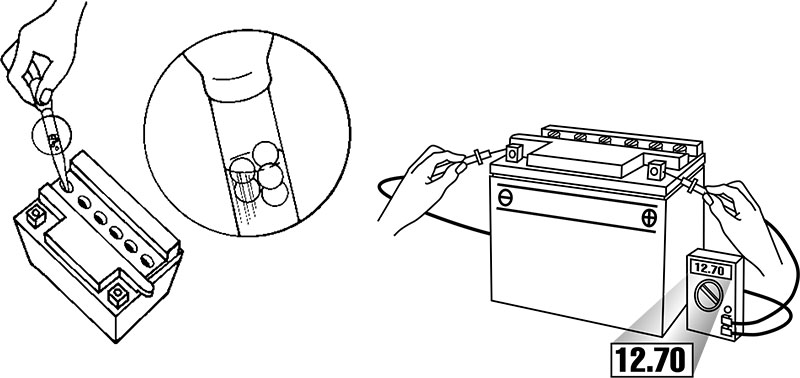
Check charge condition using either a hydrometer or voltmeter. With a voltmeter, voltage readings appear instantly to show the state of charge. Remember to hook the positive lead to the battery’s positive terminal, and the negative lead to the negative terminal.
A hydrometer measures the specific gravity of each cell. The specific gravity tells the degree of charge; generally, a specific gravity of about 1.265 to 1.280 indicates a full charge. A reading of 1.230 to 1.260 indicates the battery should be charged before testing. The chart below shows the charge level as measured by syringe float hydrometer, digital voltmeter and five ball hydrometer.
Methods of Checking Battery Condition
| State of Charge |
Syringe Hydrometer |
Digital Voltmeter |
5-Ball Hydrometer |
100% Charged
w/Sulfate Stop |
1.280 |
12.80v |
5 Balls Floating |
| 100% Charged |
1.265 |
12.60v |
4 Balls Floating |
| 75% Charged |
1.210 |
12.40v |
3 Balls Floating |
| 50% Charged |
1.160 |
12.10v |
2 Balls Floating |
| 25% Charged |
1.120 |
11.90v |
1 Balls Floating |
| 0% Charged |
less than 1.100 |
less than 11.80v |
0 Balls Floating |